Calligraphy Drying Rack (P1)
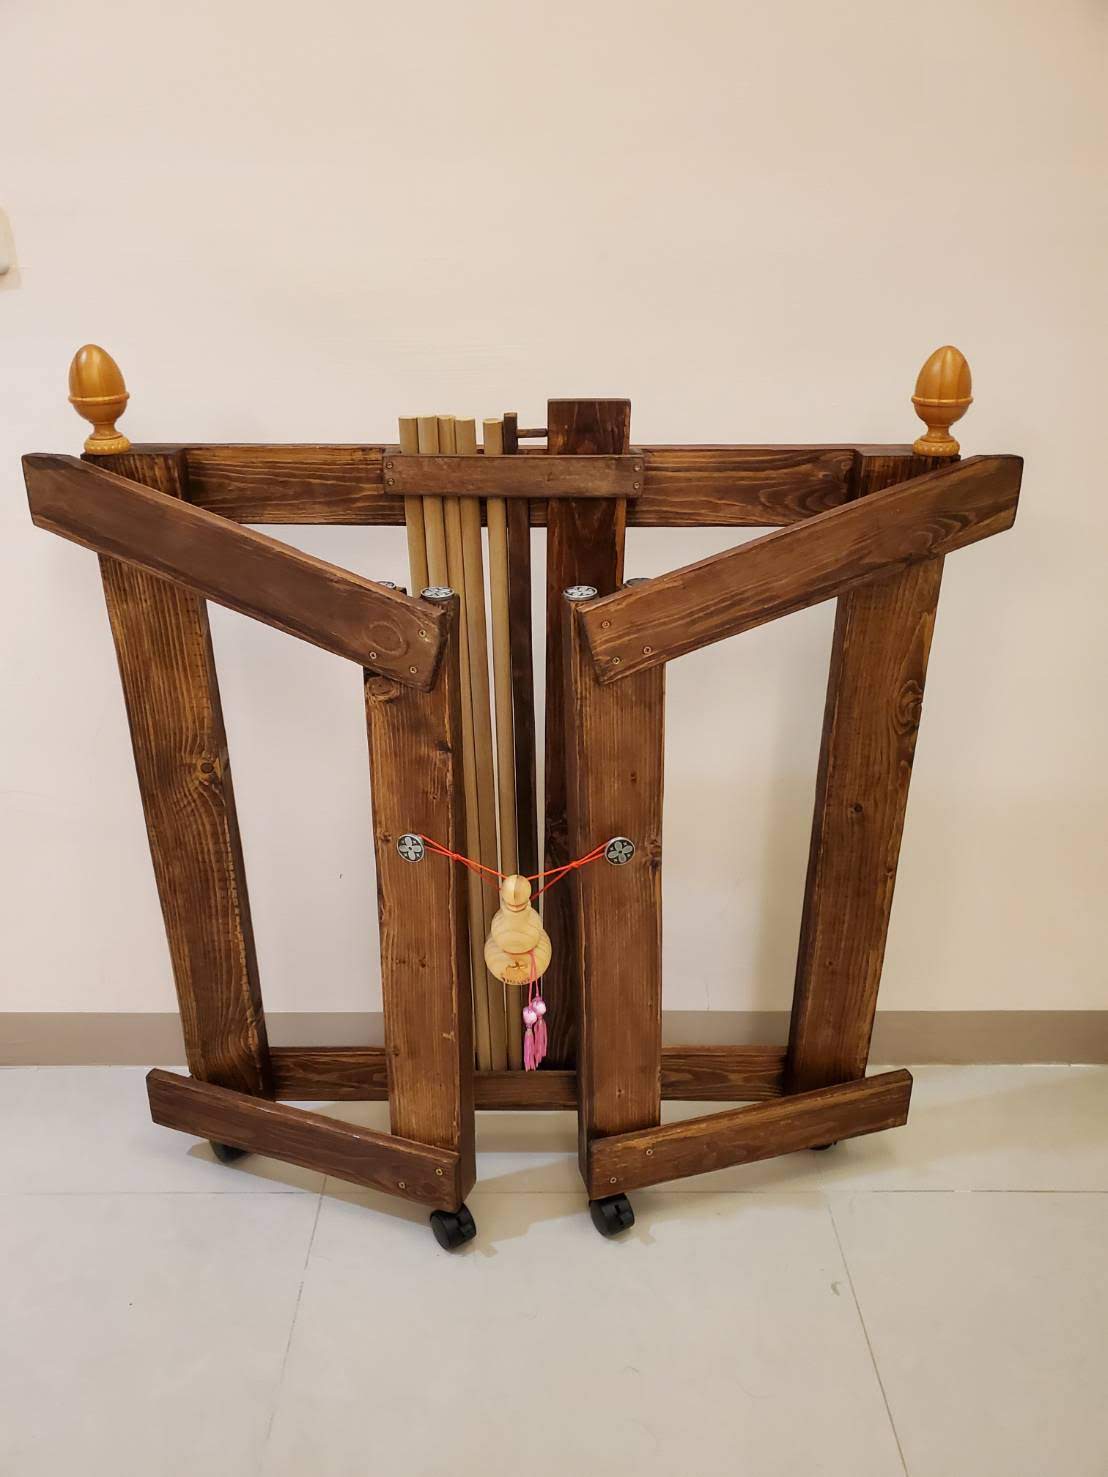
Josh Wang •Commissioned by a family member who practices calligraphy, this project features my largest construction so far. The goal is to construct a strong, functional, and a pleasing piece of furniture. With the planned joints, it will serve as a great skill-building project following the last stool project. Imagine a solid wooden rack, simply built with 3 frames, two of which fold closed like wings that minimize the footprint as well as the effort required to stow it away. Wonderfully simple.
Requirements
- Fits multiple sheets of paper for drying, where each sheet is 54" x 27.5"
- Removable & sloped sheet racks
- Matches other dark walnut? furniture
Portable & minimal
Design
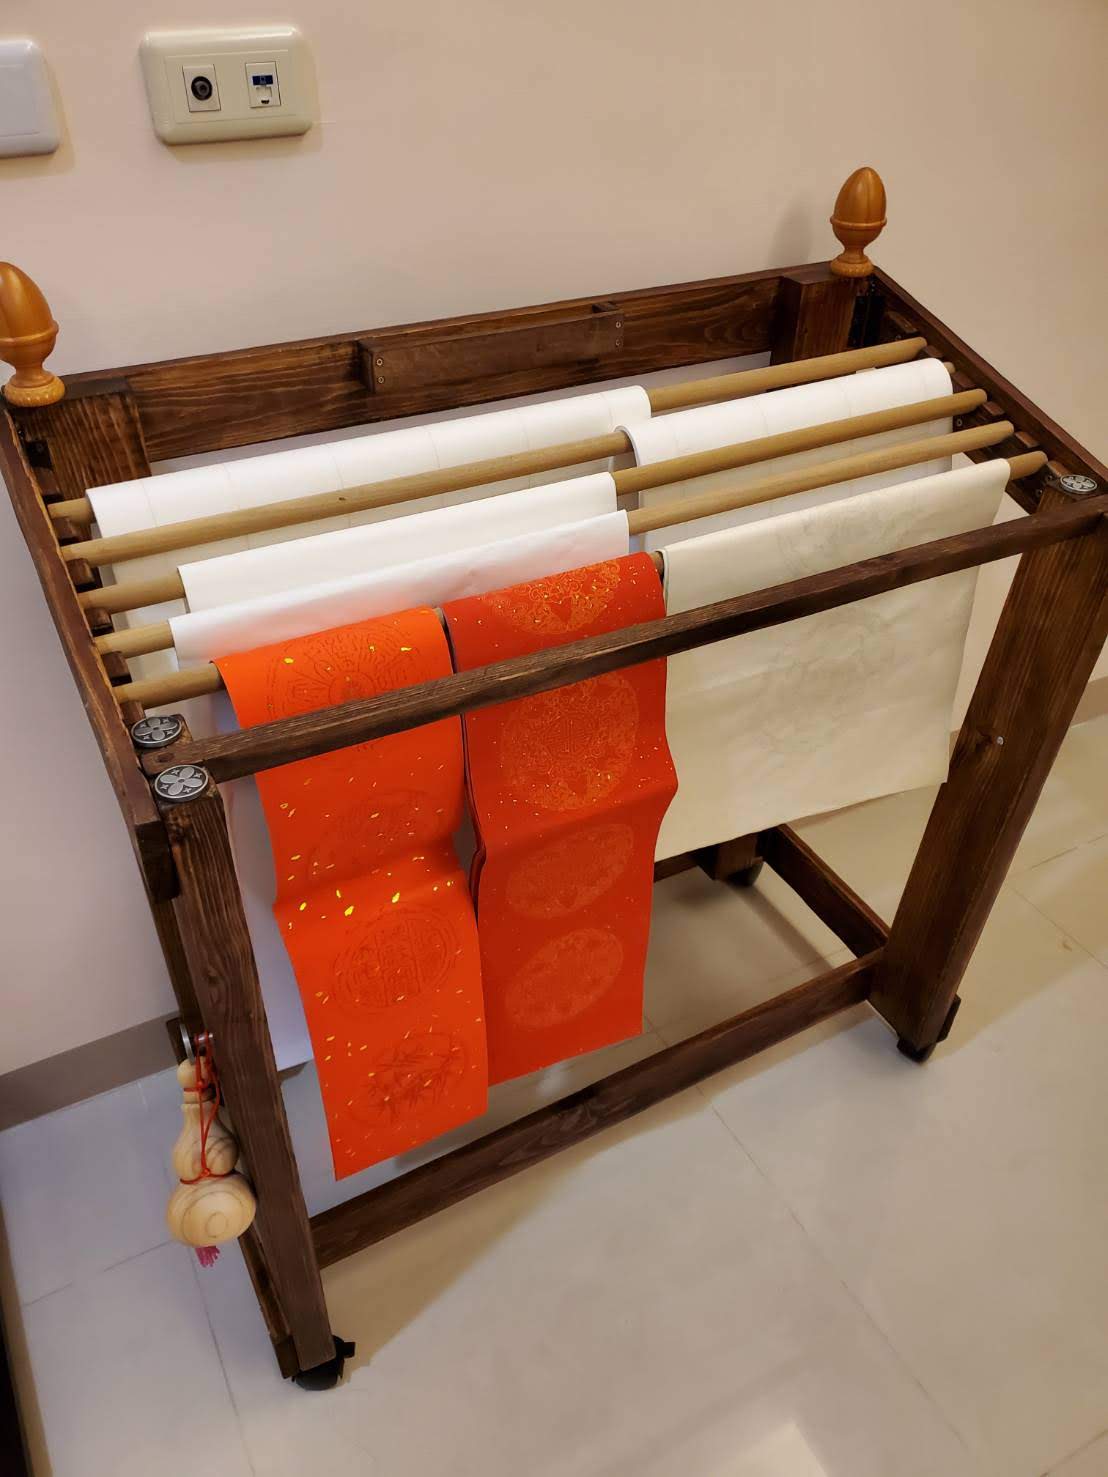
Upon commission I was given an example of what was desired - another artist had already commissioned a different maker with similar specifications.


This work fulfills most if not all the requirements for my commission, but I'd like to improve upon it both aesthetically and functionally. For instance, I would probably remove the ornmaments typically reserved for post caps. I understand the need for a removable stretcher that solidifes the front-end of the wings that open up, but at least on the bottom side I am thinking of upgrading it to be a fall-down shelf. This will add the convenience of shelf-space for short & flat materials while also solidiying the bottom structure when open.
My only hesistation is that adding surfaces and shelves runs contrary to a portable and minimal nature. It crosses that line from "stowable when not in use" to something more "convenient for packing up when moving". Last but not least I will opt to not use any metal fasteners (save for hinges) and instead use traditional mortise & tenon joinery. The splay will obviously introduce some more difficulty than your normal mortise & tenon.
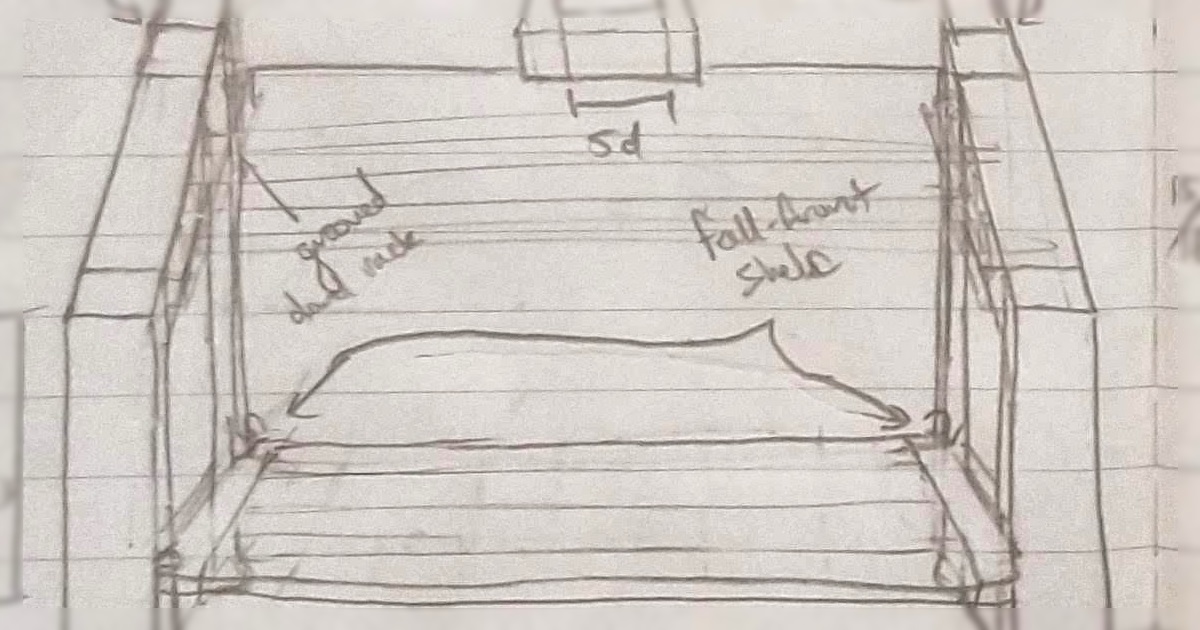
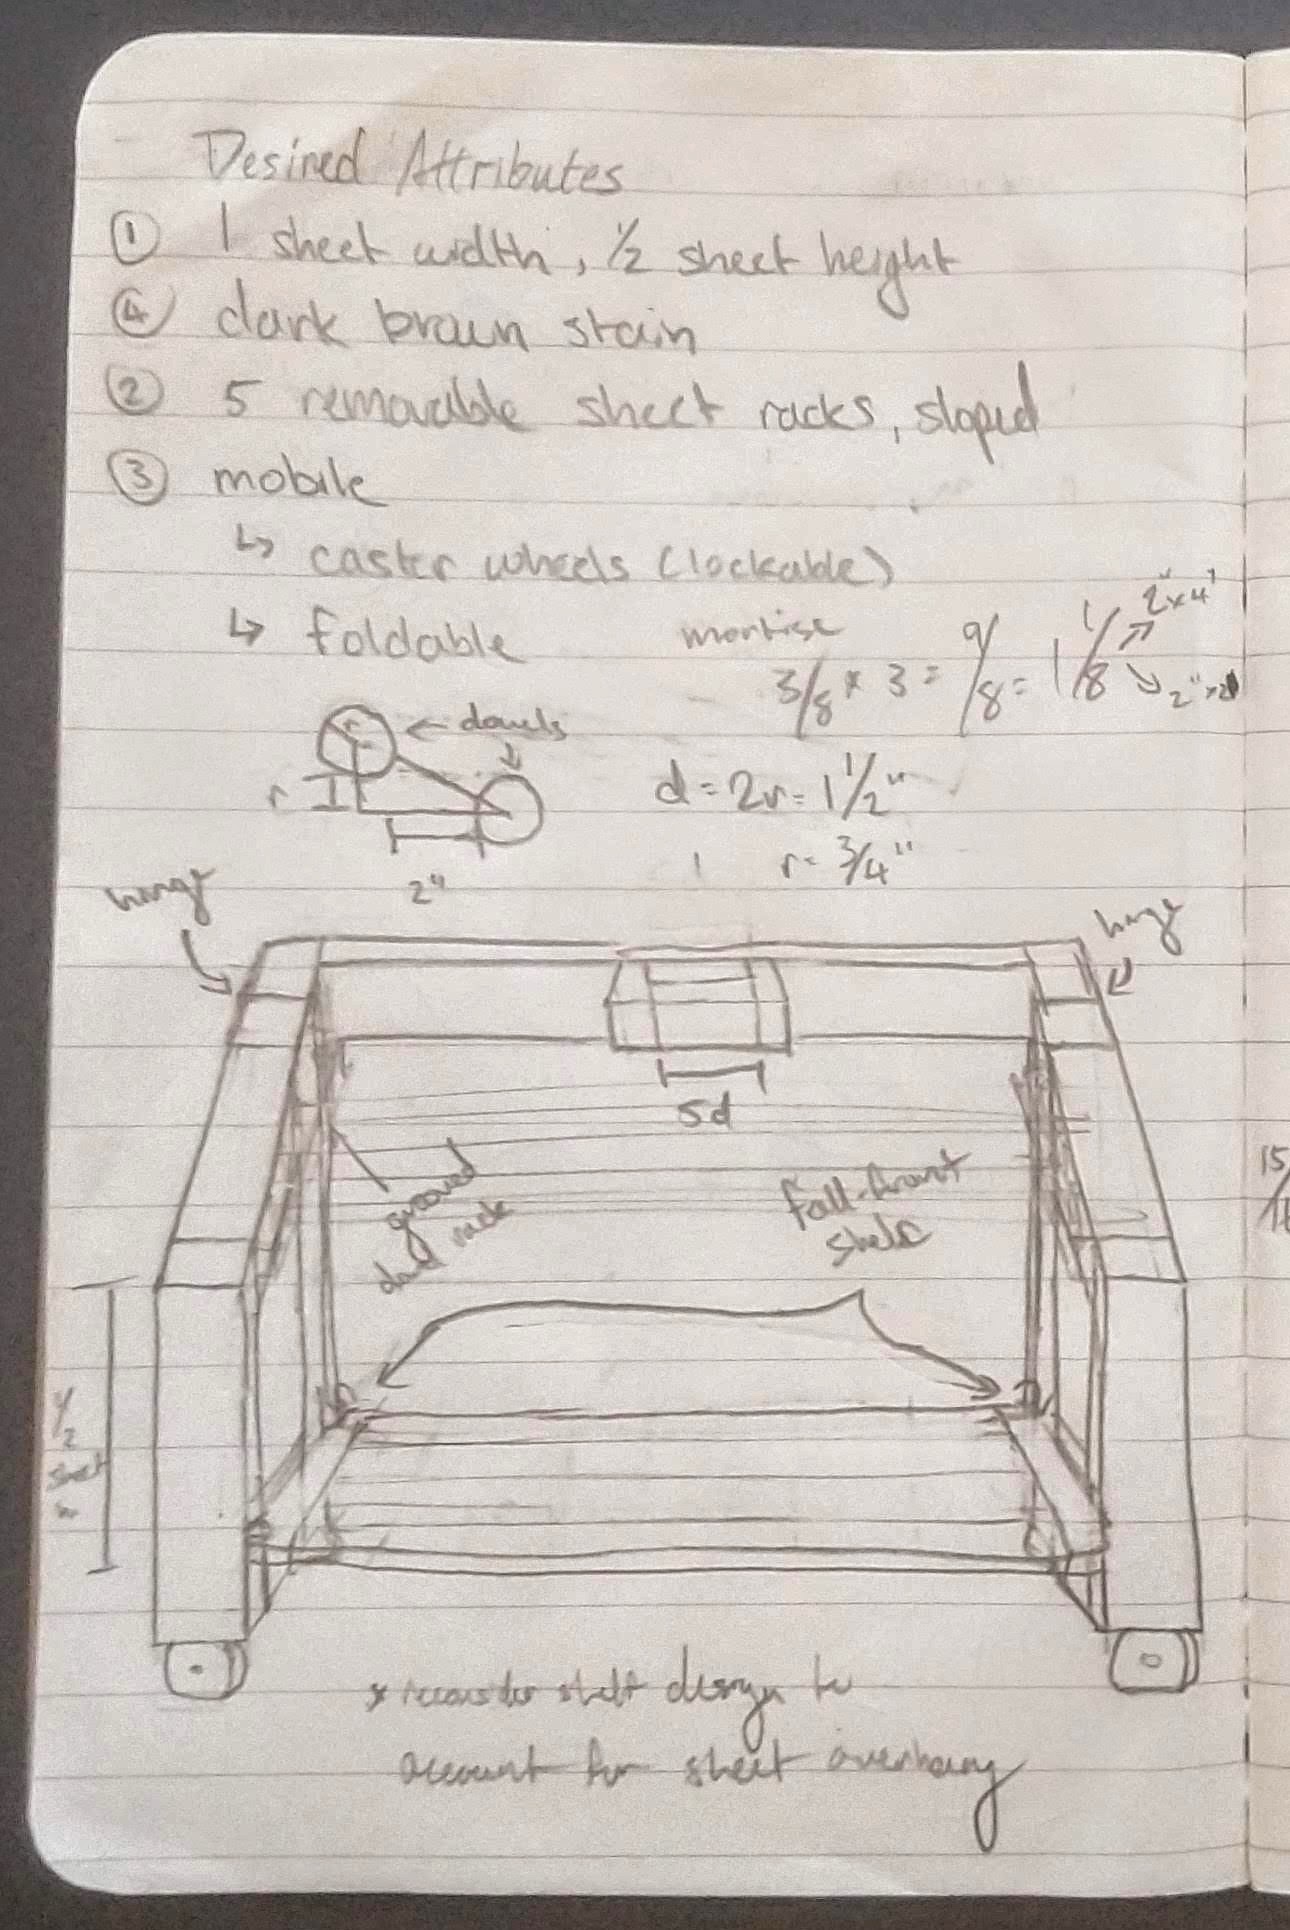
 Consider this sketch which encompasses such features. With angled mortise & tenons it's probably wise to angle the tenon rather than the mortise, given how much easier it is to saw the tenon at an angle than to chop the mortise at an angle. I will just have to consider the angle of the splay and how it might affect the fit & strength of the mortise & tenon. As for the inner rail that the rack rods sit on, I plan to run a groove parallel to the top rail of the frame much like a housing dado except with the grain.
Given the simple and low expectation nature of the project, I will use SPF (spruce, pine, fir) untreated lumber from a big box store along with a dark walnut stain and paste wax finish. I am really excited for this project because it will test the most basic skills I have built up so far: planing longer pieces of wood, grooving, sawing, and of course mortise & tenon joinery with a new angle!
 ANGO
ANGO